The visualization shows one round of a match between Astralis vs Liquid. You can drag the slider to progress through ticks in the round. Each red or blue circle is a player. Each red or blue rectangle indicates where the player is looking. The shade of the rectangle indicates if they are looking up or down. I've included both the tick in the demo file and the matches tick number, since the two values aren't exactly the same.
The visualization demonstrates how I discretize the map into values that I can think about and write heuristics for. Below is a list of the different discretizations. They are derived from ray tracing in CSGO's engine and parsing the map's nav mesh.
- Labeled Regions - The most basic structure. This breaks the map down into large regions. Each region accounts for many nav mesh areas.
- Nav Mesh Area - An axis-aligned bounding box (aka a rectangle aligned with the X/Y/Z axes) that indicates some part of the map that can be traversed by walking. The nav mesh is a directed graph, so each area has links to all it's neighbors: the other areas that are directly reachable from it by jumping or walking. Each nav mesh area is part of some labeled region. Select the nav_mesh option from the visualization's Discretization Technique dropdown and mouse over the map to see each nav mesh area's neighbors (red), number (green), and labeled region (green).
- Order - A sequence of labeled regions. I use orders to guide my bots through the map. An offensive order is a sequence of labeled regions to enter a site (like [LongDoors, LongA, ARamp, SiteA]). There are multiple offensive orders per site to encode all the standard ways to enter a site. A defensive order is a sequence of labeled regions to protect a site from one offensive order. Defensive orders' labeled regions are annotated as hold points to tell bots where to stand (like pit or long corner), choke points to tell bots what to watch (like long doors), and aggressiveness rating to determine if pushing or baiting bots should use them I currently design the orders by hand.
- Visible Areas - For each nav mesh area, all the other nav mesh areas that are visible from it. This is a very rudimentary potentially visible set (PVS). It's computed by tracing rays only between the centers of nav mesh areas. Therefore, it's possible that two nav mesh areas visible from each other, but they are not considered visible. (Check out mid for particularly egregious examples.) I can make this better in the future by tracing more rays, but it's not worth it for version 0.1. Select the visible option from the visualization's Discretization Technique dropdown and mouse over the map to see the visible areas from each area (blue) and the non-visible areas (red).
- Danger Areas - For each nav mesh area, all the other nav mesh areas that are "dangerous" because enemies can appear there. They are the subset of visible areas that are neighbors of non-visible areas. This means enemies can walk or jump and transition from not visible to visible in the danger areas. Select the visible option from the visualization's Discretization Technique dropdown and mouse over the map to see the danger areas from each area (blue) and the non-danger areas (red).
- Reachability - For each nav mesh area, the distance to walk to all the other nav mesh areas. This accounts for "one way edges" like jumping from TSpawn to OutsideTunnel but walking through TRamp to get from OutsideTunnel to TSpawn. Select the reachability option from the visualization's Discretization Technique dropdown and mouse over the map to see the distance to the other nav areas. Close areas are blue and far ones are red.
- Label Region Distance - For each nav mesh area, the distance to the labeled regions. Since there are multiple areas per labeled region, I include both the nav area with the closest distance and median distance. Select the label_distance_region option from the visualization's Discretization Technique dropdown and mouse over the map to see the distance to the other nav areas. Close areas are blue and far ones are red.
Heuristics Step 2: Breaking Down CSGO Into Manageable Chunks
I break the bots' logic into three behavior trees. Each behavior tree is a controller that tells the bot what to do at some level of abstraction. (note: for this blog post, you don't need to know anything more about behavior trees. I won't dive into their details here.).
- Level 1 - Global Behavior Tree - Manage team coordination. This includes assigning bots to different orders (i.e. attack A site by going long or cat), determining entry index (who goes first/second/third when multiple bots follow the same offensive order into a site), determining hold index (whether to use a passive or aggresive hold point when on a defensive order), predicting enemy team member positions, and managing communication (i.e. if one bot sees an enemy, make sure the rest are aware of the enemy).
- Level 2 - Priority Behavior Tree - Control an individual bot's decisions (aka what goals they prioritize). This includes deciding whether to engage an enemy or follow an order, how to time entries into a site based on teammates' positions, which enemy to target during an engagement, where to look if following an order (and not engaging an enemy), and how to convert an order into a path of nav mesh area nodes.
- Level 3 - Action Behavior Tree - Control an individual bot's mechanical skills by translating the priority tree's output to mouse and keyboard commands that control aiming, firing, and movement.
There is one main bot parameter: aggressiveness. Bots can either be pushers or baiters. The behavior trees use this parameter to set order indices, hold indices, and control spacing.
Heuristics Step 3: Implementing The Trees
Global Tree
- Create orders - load hand-specified orders into tree
-
Assign
bots to orders -
- CT - Compute path from spawn position to C4. Assign bot to offensive order with closest labeled area to bot spawn position.
- T - Use distance to places discretization to compute distance to all hold points on all defensive orders. Assign bot to defensive order with closest hold point that doesn't already have a T assigned to it.
- Assign entry index - for each CT bots on the same order, sort the bots by aggresiveness. Ensure pushers go first by assigning them lower entry indices.
- Assign hold index - Assign T bot to their order's aggressive hold point if they are a pusher. Assign them to the passive hold point if they are a baiter. The hold integration tests demonstrate these different hold points.
- Compute enemy possible positions - Compute the most likely locations of all enemy players. My current heuristic is to run a diffusion model to compute where enemies could've reached if they were running at max speed through areas not visible to bots on the current team. The possible nav areas integration tests demonstrate this feature. The lines on the ground indicate possible nav areas where an enemy could be. The color indicates which enemy player. The tests show that visibility diffuses through regions that enemies can't see.
- Communicate team memory - Compute the most likely locations of enemy players recently seen by the team. My current heuristics is to store the last known position of all enemies seen within the last second. The communication integration tests demonstrate this feature.
Priority Tree
- Prioritize danger areas - Prioritize danger areas based on what teammates have checked recently and whether enemies could be near the danger areas. The danger integration tests demonstrate CT bots checking danger areas based on the diffusion model computation of possible T positions. (note: This is technically implemented in the global tree right now. I will move it to the priority tree in the future.)
- Update player memory - Compute the most likely locations of enemy players recently seen by the current bot. My current heuristic is to store the last known position of enemies by this bot seen within the 2.5 seconds. The memory integration tests demonstrate this feature.
- Determine engage or follow order entry index - Prioritize fighting (engaging) vs accomplishing the objective (following the order). If an enemy is visible, remember, or communicated and could be visible from a nearby enemy, then engage. Otherwise, follow the order.
- Select target - If engaging, select an enemy to aim and move towards.
- Select fire mode - If engaging, select fire mode (single, burst, or spray) and whether to move. Move if too close to with teammates or if enemy is close enough for run and spray. The aim and engage integration tests demonstrate this feature.
- Compute nav area - If CT, compute current labeled region in order and then compute which nav area in the region to move to. If T, compute which nav area in hold point to move to.
- Compute spacing - If T, no spacing issues as all T's are assigned to different hold points. If CT, ensure good spacing for bots on the same order and good timing for bots on different orders. CT pushers with entry index 0 (first entry index) will move towards site first once everyone is ready (has reached the start of their order.) CT baiters with entry index greater than 0 will follow those ahead of them on the same order. CT lurkers (baiters with entry index 0) will move towards site once everyone is ready and someone has seen an enemy. The push/bait/lurk integration tests demonstrate this feature.
- Compute path - Given a destination nav area (enemy position if engaging, nav area from order if following order), compute a path of (X,Y,Z) points on the nav mesh to reach that destination. My current heuristic is to run A*.
Action Tree
- Move - Compute the WASD keyboard outputs to reach the next point in the path. Also, output space if the next point is high in the z dimension. Output crouch while jumping to maximize jump height.
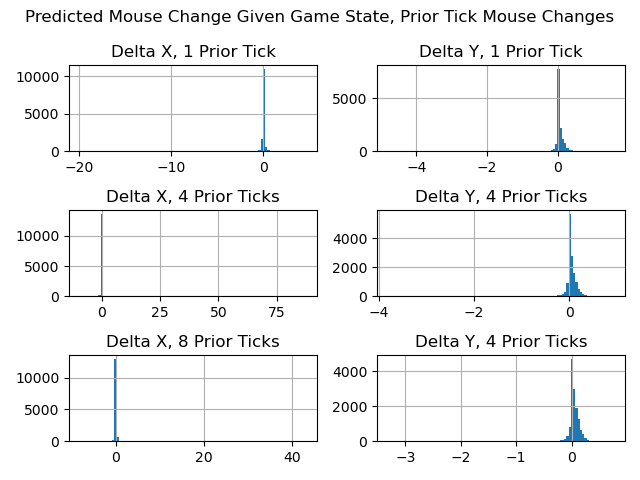
- Aim - Compute the change in mouse position to aim at the target. If engaging, the target is an enemy player. If not engaging, the target is either: a choke point, a danger area, or an area on the path. I compute the per-tick changes in mouse position using a second order model explained here.
- Fire - Press left mouse button to fire if aiming at the enemy. Also, press mouse button with right timing for fire mode (single/burst/spray).
Please Reach Out!
That was a lot of heuristics! I hope to start replacing them with more data-driven, learned models. If you have advice, questions, or comments, please email me at durst@stanford.edu.